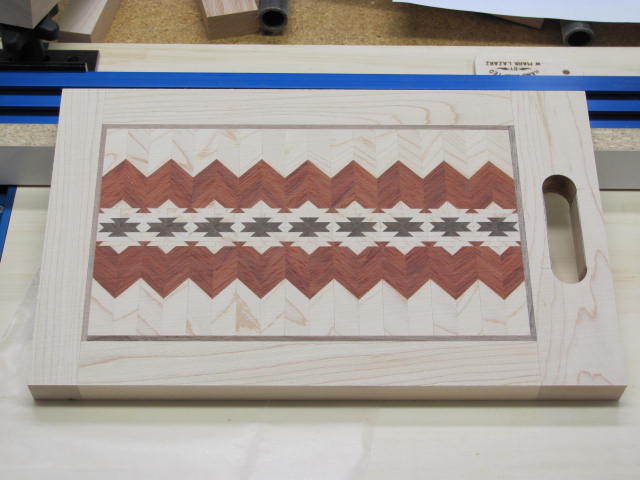
Completed Assembly

Cutting Board

My favorite sister is moving to Henderson, NV so I wanted to give her a little gift with a Southwestern design. Using Lamination Pro software, I made a design using white maple, walnut and blood wood. The software is amazing and allows designs up to 5 generations. The strips were cut and glued together to form the initial lamination which was then cut into strips and every other one was flipped and re-glued to form the first generation. This assembly was cut 9 times lengthwise down the center into eight 1/8″ strips which were flipped to form the Southwest design. All of the pieces were re-glued, sanded flat, trimmed square and a 1/8″ walnut border was glued on and again trimmed square before adding the maple outer border. After the glue dried, the assembly was again sanded flat and the hand hole was cut and the edges were routed with a quarter round bit. Butcher block oil was used as the finish.

Starting Point
Strips of maple, walnut and blood wood were cut to specific widths and glued to form the initial lamination.
Sanding Flat
Several times throughout this project my drum sander was invaluable. Here the initial lamination was sanded flat in preparation for subsequent steps.
Laminate Cut
The lamination was cut into strips at a specific angle to make pieces for the first generation assembly.
First Generation Pieces
Here you can see the pieces cut from the lamination and the design effect by flipping every other piece.
Gluing Jig
Aligning the pieces during the gluing process is critical to the quality of the finished design. I made a gluing jig to help me keep things from moving around when clamp pressure is applied.
First Generation Cut
The first generation cut must me made perfectly down the center.
First Cut Completed
Looking good! The first cut was perfectly centered.
Alternate Design
It’s fun to play with the pieces. Here a slide of 1/2 unit pops a diamond pattern into view. This was not my plan so onto the next step.
Cutting the 1/8" Strips
You can see how close the blade is to the fence for the 8 pieces that must be cut for the design.
Pust Block
I made a sacrificial push block for the narrow strip cuts to be safely made on the table saw.
Design Assembly
The gluing jig was used for the sub-assemblies of the Southwest design.
Final Design Emerges
Here’s what the final design looks like before being sanded flat and trimmed to accept the outside borders.
Completed Assembly
The borders were added and the hand hole was machined. All edges were eased with a quarter round bit on the router table.
Finish Applied
The cutting board was sanded to 320 grit and butcher block oil was applied for the finish.
Happy Sister
Ginni was pleased with the gift as I gave her a farewell kiss.

Similar Posts