stock and new ZCI

Table Saw Modification for Zero Clearance Inserts

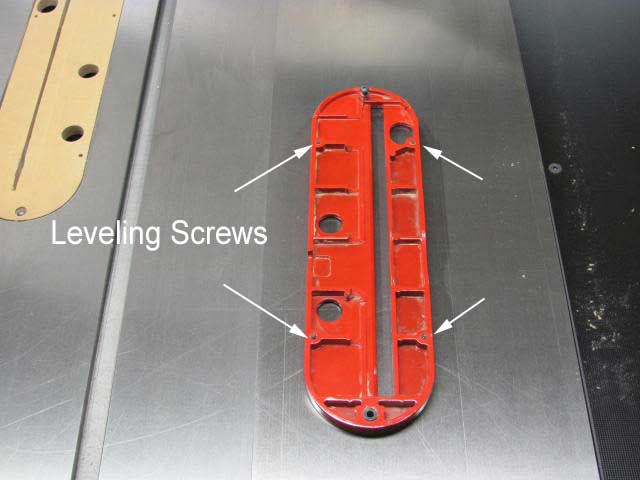
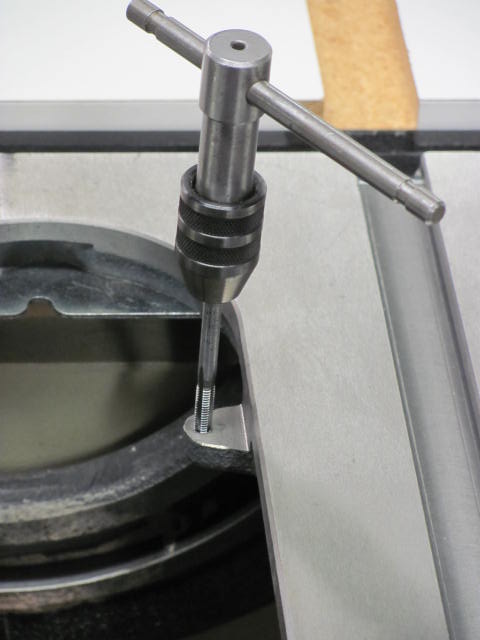
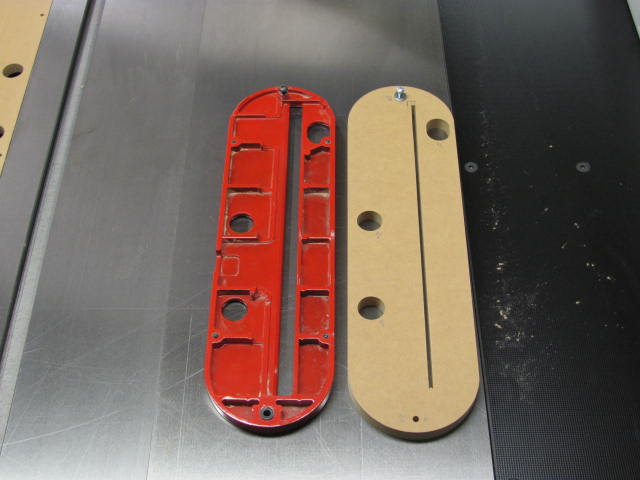
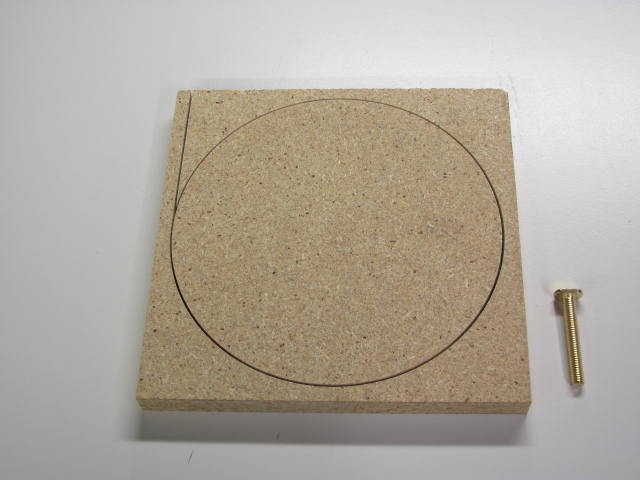
My cabinet saw’s stock inserts are metal castings with 4 set screws used for leveling the insert with the top. I like to make my own Zero Clearance Inserts (ZCI) made from 1/2″ thick MDF which rests a tad below the surface of the table when resting on the tabs supporting the insert. I made a ZCI and copied the hole pattern which meant that it must be leveled the same as the stock inserts so when it comes time to change it, I need to go through the leveling process with each new replacement ZCI. This is a pain in the butt! Why not level once and be done with it? My solution was to drill & tap set screw holes in the tabs supporting the insert and locate them so that they wouldn’t interfere with the stock inserts. It works just great and making new ZCI’s is a lot easier because there are 4 less holes that need to be drilled.

stock-insert
This is what the stock insert looks like on the reverse side. The set screws rest on the tabs which are part of the table saw’s cast iron top.
tabs
The tabs were large enough to locate 10-32 set screws without interfering with the stock insert leveling screws.
tab
Here’s a closer look at where the hole was drilled and tapped. You can see the wear spot where the stock insert leveling screws rest.
stock and new ZCI
Here’s a look at the underside of the stock insert and the new ZCI without leveling screws.
Sawing the ZCI slot
Here’s a neat trick for safely drilling the slot for a new ZCI. Rest the new ZCI on spacers so that the insert is a few thousandths below the surface, clamp it in place (here I’m using a feather board), turn on the saw and raise the blade through the new insert. I had to extend the slot to the rear using a scroll saw to accommodate a riving knife. This method works much better than lowering a new ZCI onto a spinning blade.

Similar Posts