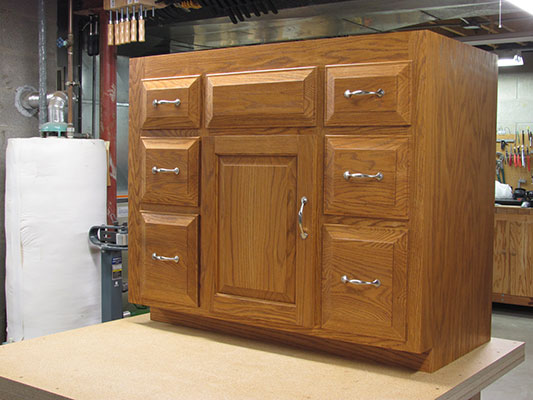
Bathroom Cabinet

Now that I am retired, I can make things that I only dreamed of in the past. I have always wanted to build casework but didn’t have the time nor the necessary tools to accomplish the job – now I have both so my first project was a bathroom cabinet. The impetus for this project was a visit to a bathroom remodeling business. We decided to gut the old tub surround, install a new one, install a new floor, plumbing fixtures and medicine cabinet. Light fixtures had to be replaced also since they were 1970 vintage. We looked at vanities and got sticker shock for anything of quality so that was the push I needed. Where do you start with no knowledge of cabinetmaking? I found loads of information on the Internet, in magazines, books and DVDs. I studied for a few months then wrote a spreadsheet to help size various components. Next, I learned to use Google Sketchup (now called Trimble Sketchup) and drafted a 3D model of the cabinet. The time invested in learning this program was well worth it because the project was too complex to “design as you go”.
Cabinets in general conform to certain standards because tops and drawer slides are made in standard sizes. The next consideration was drawer sizes. Because I wanted dovetail joinery, I needed to make my drawer sides a certain height in order to avoid splitting a tail when you look at it from the top so, based on my dovetail jig, this dimension needed to be in one inch increments plus 1/4″. Armed with these parameters, the spreadsheet figured out all face frame openings and door opening, drawer dimensions, panels, etc. taking into consideration my desired cabinet height, number of drawers, raised panel router bit clearances, door and drawer overlaps and stock thicknesses. Transferring these figures to my Sketchup drawing allowed me to see if any adjustments were needed or if there were interferences.
Red oak was my choice for the face frame, doors and drawers. Hard maple was selected for the drawer sides and maple plywood was chosen for the drawer bottoms. The cabinet sides were made from oak plywood and the interior cabinet parts were made from melamine panels so everything would look nice and bright when you opened the door. Blum drawer slides were selected for the drawers and soft close European style hinges for the door. Dovetail joinery was used for the drawers and dowel joinery for the face frame and cabinet assemblies. The cabinet was finished using General Finishes Pecan stain followed by 5 coats of General Finishes Arm-R-Seal satin urethane top coat.