Garden Bench Project

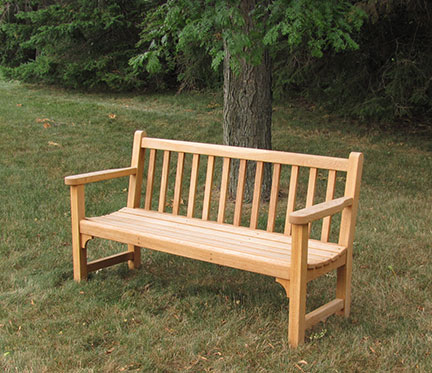
I found the plans for this project on Minwax’s website. This looked like a neat little project that would beautify our yard so off to Kettle Moraine Hardwoods I went. White oak was selected for the bench parts and the entire thing was assembled with dowel joints. I really like dowel joints because, if they are done correctly, they are as strong or stronger than mortise and tenon joints, easier to machine (if you have a Dowelmax jig), and they align perfectly. Titebond III waterproof glue was used as the adhesive because the bench will live outdoors.
I made mdf patterns for some of the parts so I could easily trace the configuration without having to do multiple layout work. The pictures tell the story about how the project proceeded. The bench was finished with clear Thompson’s Water Seal so as it ages, it takes on a gray weathered look. Pay particular attention to the doweling pictures because the Dowelmax jig is an amazing device.


;


Arms were attached using stainless steel screws. The project turned out real nice and we now have a beautiful garden bench that is functional and comfortable gracing our back yard.


