Bathroom Renovation

After living in our home for over 20 years, we decided to fix the place up now that we’re heading into retirement. Marilyn has been nagging me about our main bathroom for years because it was so dated with hanging light fixtures and yellow tub and toilet (yuk). I have been equipping my wood shop with new stationary tools with the idea that I would learn how to make cabinets so this was a perfect way to get started.

My main gripe about the old bathroom was the squeaky floor so the first thing I did was remove the old linoleum using a Fein MultiMaster that I received as a Christmas gift. Surprise, surprise! I found that the old toilet had been leaking for quite a while and the floor around the toilet was rotten. OK, first things first so I completed the flooring removal. If you have ever tried to lift linoleum, you know how difficult it is but the Fein MultiMaster made the job easy. It was a joy to use and it made a crummy job more than just tolerable.
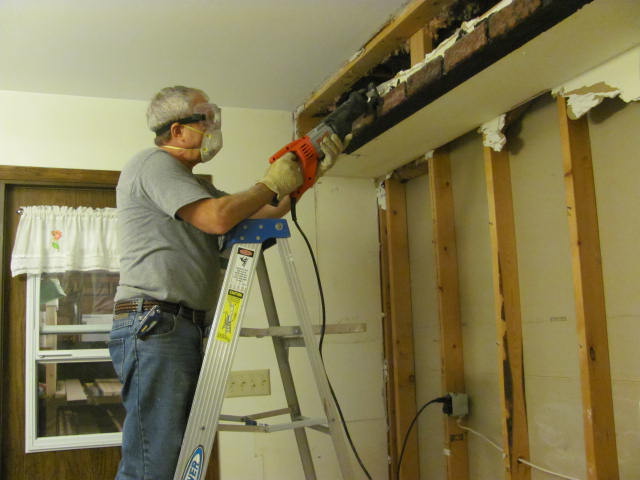
Gotta do something about the floor. Went into the basement and looked from below and here is what I saw.


Hey, I get a chance to use the Fein MultiMaster again! Pull the toilet and cut around the rotten wood making sure I hit the rafters in the middle so I can drop in a new piece.

Oh, oh, another problem. I found out why the toilet was leaking. The cast iron ring that holds the toilet up against the soil pipe had disintegrated.

Nothing was holding the toilet in place except for the wax ring. Another MultiMaster moment. Cut the top off of the soil pipe so a new plastic ring can be glued in place. Things are starting to come together nicely. Measure and cut a replacement piece for the sub floor and screw into place (no more squeaking nails).

Time to remove the old tub surround. It was installed when the house was built back in the 1970’s and it was put in place before the walls were constructed. It had to be cut up to remove it and once again, I used the Fein MultiMaster. The old tub was made of fiberglass so precautions were taken to avoid breathing the dust. This was the most difficult phase of the project because the fiberglass was extremely hard to cut and it was very abrasive to the cutting tools.


After the old tub was cut up and removed, I finished my prep by removing the old medicine cabinet, the old sink and vanity, and re-wired for installing the new light fixture on the wall above the vanity instead of the old lights which were hanging from the ceiling by chains. That was fun because I love crawling around in the attic fiberglass on hot days!
Now I get to watch somebody else work! The project was turned over to our remodeling contractor who we hired to install the new tub, surround, floor and toilet. Here are a few pictures of that phase.


Prior to the installation, I made a vanity to replace the old one. It was my first casework project and I will devote another post to it.
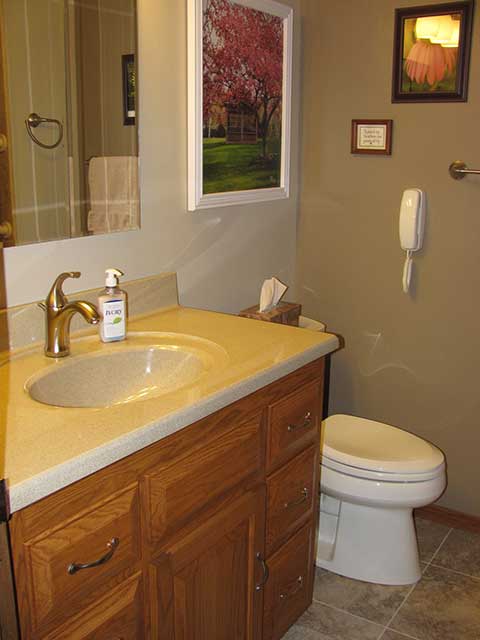
The completed renovation was exactly what we wanted!